Old or damaged window hardware can make opening and closing a window difficult, affect ventilation, and sometimes create security concerns. Fortunately, replacing worn components is often a manageable DIY project when you have the right tools and follow a careful process. One of the most important parts to inspect is the hinge system, as worn hinges can cause the sash to become misaligned or difficult to operate.
Whether you are repairing a uPVC, aluminium, or timber window, understanding how the hardware works can help you complete the job safely. This guide explains how to identify worn components, prepare for replacement, remove old fittings, install new ones, and test the finished window.
Why Replace Old Window Hardware?
Window hardware naturally experiences wear because it is used repeatedly and exposed to changing temperatures, moisture, dust, and everyday pressure. Over time, screws can loosen, metal components can corrode, and moving parts may become stiff.
Damaged hardware can produce several noticeable problems. A window may fail to close properly, rub against its frame, or require excessive force to open. In some cases, the sash can become unstable when opened.
Replacing worn components can restore smooth operation and improve the overall performance of the window. It may also help prevent further damage to the frame and sash.
Signs Your Hinges Need Replacing
Before beginning the repair, determine whether the hinges are actually responsible for the problem. Several warning signs can indicate that replacement is necessary.
Look for visible rust, bent metal, cracks, or excessive movement around the hinge area. If the window drops slightly when opened or appears uneven in the frame, worn hardware could be the cause.
You should also pay attention to unusual sounds. Grinding, squeaking, or clicking may indicate that moving components have become damaged or excessively worn.
Loose screws do not always mean replacement is required. Sometimes tightening existing screws and applying an appropriate lubricant can solve the problem. However, if the metal is damaged or the hinge mechanism has significant play, replacement is usually the better option.
Tools and Materials You Will Need
Having everything ready before starting can make the project considerably easier. The exact tools depend on your window type, but most basic replacements require:
- A suitable screwdriver
- Drill and drill bits, if necessary
- Replacement hinges of the correct size
- Measuring tape
- Pencil or marker
- Cleaning cloth
- Mild cleaning solution
- Appropriate screws
- Safety glasses
- Work gloves
- A stable support or second person for larger windows
Make sure the replacement components match the original specifications. Pay attention to dimensions, screw-hole positions, opening direction, and the weight of the window sash.
Measure Before Buying Replacements
One of the most common mistakes is purchasing replacement hardware without checking measurements. Even components that look similar can have different dimensions and mounting arrangements.
Start by measuring the existing hinge from end to end. Check its width, length, fixing-hole positions, and overall design. You should also determine the type of window and how it opens.
If possible, remove one component only after you have identified a suitable replacement. Taking photographs of the existing setup can also help you remember exactly how everything was positioned.
For unusual or older windows, it may be useful to take the original component to a specialist hardware supplier for comparison.
Prepare the Window Safely
Safety should be the priority before removing anything. A window sash can be surprisingly heavy, particularly when it contains double or triple glazing.
Close the window and place it in a stable position. If the design requires the sash to remain open during removal, make sure it is properly supported. Large or heavy windows should be handled by two people.
Put on safety glasses to protect your eyes from dust and debris. Gloves can protect your hands from sharp edges and damaged metal.
Never force a stuck window. Excessive pressure could damage the glass, frame, or surrounding hardware.
Remove the Old Hinges
Once the window is secure, carefully inspect how the existing hardware is attached. Some systems use multiple screws along the frame and sash, while others have concealed fixing points.
Use the correct screwdriver to remove the screws. Applying too much pressure with an incorrectly sized tool can strip the screw heads and make removal more difficult.
Support the sash as you remove the final screws. Do not allow its weight to pull against the remaining hardware.
After removal, clean the mounting area with a cloth. Remove dirt, old lubricant, loose debris, and surface corrosion where appropriate.
Avoid enlarging existing holes unnecessarily. Keeping the original fixing positions intact can make installation easier and help maintain proper alignment.
Install the New Hardware
Position the replacement component exactly where the original was fitted. Start by inserting the screws loosely rather than tightening them completely.
This allows you to make small alignment adjustments before securing everything firmly. Check that the sash sits correctly within the frame and that the gap around the window appears even.
Once the position is correct, tighten the screws gradually. Avoid overtightening, particularly on uPVC or softer materials, because excessive force can damage the fixing point.
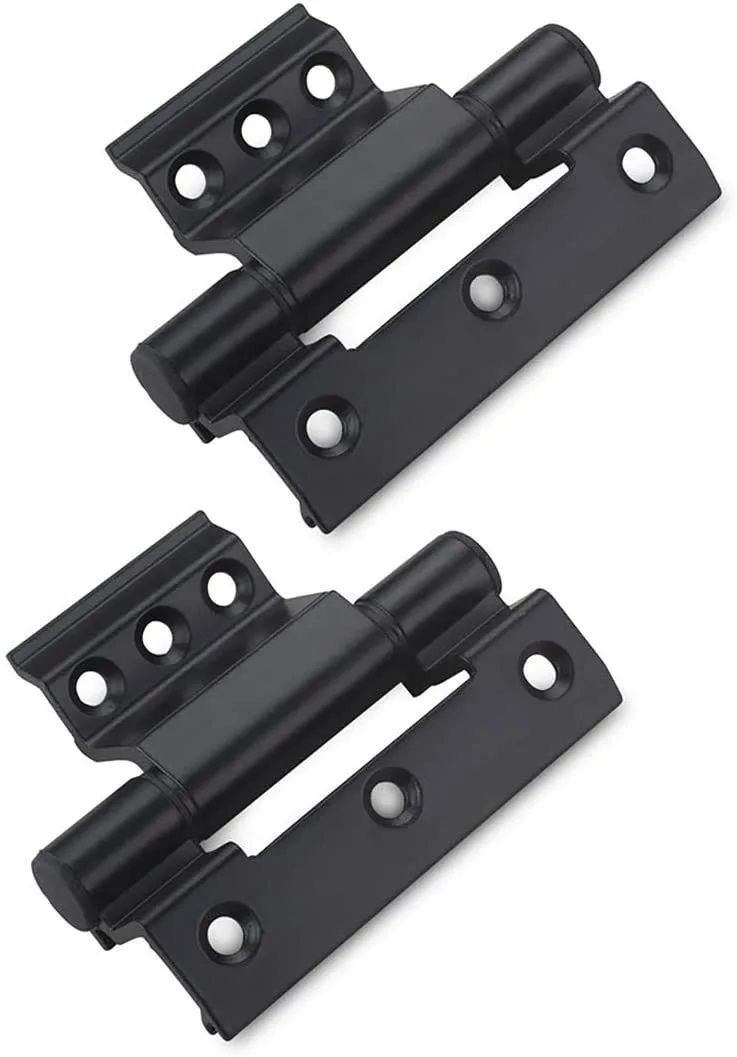
The replacement Window Hinges should sit securely without excessive movement. If the mounting holes no longer provide a firm fixing, do not simply force larger screws into the material. The frame or sash may require professional repair.
Test the Window Carefully
After installation, operate the window slowly. Open and close it several times while watching how the sash moves.
Check whether it remains level and whether it contacts the frame anywhere. The handle should operate smoothly without requiring unusual force.
If the window catches, stop and investigate the alignment rather than repeatedly forcing it. A small positioning adjustment may be enough to correct the problem.
Also check that the window closes fully and that its locking points engage correctly. Proper closure is important for security, weather resistance, and energy efficiency.
Common Mistakes to Avoid
DIY window repairs become more difficult when basic precautions are overlooked. One common mistake is failing to support a heavy sash during removal. This can put unnecessary stress on the frame and create a safety hazard.
Another mistake is buying replacements based only on appearance. Always compare dimensions and specifications.
Do not rush the alignment process. Even a small positioning error can affect how smoothly the window operates.
Finally, avoid using excessive force when tightening screws. Secure fixing is important, but overtightening can damage both the hardware and the surrounding material.
When to Call a Professional
Although many straightforward repairs can be completed at home, some situations require professional assistance. Consider contacting a qualified window repair specialist if the sash is extremely heavy, the frame is damaged, the glass is cracked, or the mounting points have deteriorated.
Professional help is also advisable when you cannot identify the correct replacement hardware or when the window forms part of a larger structural or security system.
A specialist can inspect the entire assembly and determine whether the problem is limited to the hinges or involves other components.
Final Thoughts
Replacing worn window hardware can be a practical way to restore smooth operation and extend the useful life of your windows. By measuring carefully, choosing compatible replacements, supporting the sash, and working methodically, many homeowners can complete a straightforward repair without unnecessary complications.
The key is not to rush. Take photographs before removing anything, keep track of screw positions, and test the window gradually after installation. If the problem involves structural damage or a particularly heavy window, professional assistance is the safest choice.